(→Vagrant Merchant Items: added offers) Tags: Visual edit apiedit |
m (added a para regarding check points and stages. Added link to Aspen Heroes guide.) |
||
| (20 intermediate revisions by 9 users not shown) | |||
| Line 1: | Line 1: | ||
| + | {{Infobox_Building|image1 = Aspen_Dungeon_Preview.png|level_req = 72}} |
||
| − | Aspen Dungeon is on a cycle, where it is 48 hrs open and then on cooldown for 48 hrs. |
||
| ⚫ | |||
| ⚫ | There will be waves of enemies and for each wave you have to select a hero to battle it. Health is not regenerated between waves so this dungeon is in iron man mode. Once your hero dies, they cannot take part in the dungeon until the next one opens. You can choose "Skip the Battle" in order to skip the fight itself. The layout was changed in the 1.17.37 update. |
||
| ⚫ | |||
| + | After defeating each wave, you will be presented with a reward. There are 3 different rewards possible - a Chest, a Vagrant Merchant or a Potion. Chests can provide Gold, Spirit, Gems or Monster Materials. Vagrant Merchants will sell various things to you (the prices are dependent on which Vagrant Merchant you get). Potions will either heal or buff your hero. |
||
| ⚫ | |||
| + | There are currently 6 stages (Easy, Normal, Difficult, Nightmare, Hell, Death) with 100 levels in each stage and once you pass 50 levels the next time you enter the dungeon it will automatically smash up to your current check point. Check Points are at levels 50 and level 100 of each stage. So if you pass to Easy 98 the next time aspens opens you will smash the first 50 levels and start from Easy 51 until you are able to pass Easy 100. |
||
| − | You can choose "Quick Combat" in order to skip the fight itself. |
||
| + | ==Vagrant Merchant Items== |
||
| − | After defeating each wave, you will be presented with a reward. There are 3 different rewards possible - Chest, Vagrant Merchant, Potion. |
||
| + | The discount/overprice is calculated based on the maximum [[Marketplace]] prices. The higher the discount is, the more you get for your money. The higher the overprice is, the less you get for your money. |
||
| − | Chests can provide Gold, Spirit, Gems or Monster Materials. |
||
| − | Vagrant Merchants will sell various things to you (the prices are dependent on which Vagrant Merchant you get). |
||
| − | Potions will either heal or buff your hero. |
||
| − | == |
+ | === Handsome Boy Merchant === |
| − | '''''You save''''' is calculated based on [[Marketplace|<u>Marketplace</u>]] prices where appropriate.<br> |
||
| − | The higher ''<nowiki/>'you save'<nowiki/>'' is, the more you get for your money. The lower ''<nowiki/>'you save''' is, the less you get for your money. |
||
| ⚫ | |||
| − | === Old Lady Merchant from Marketplace (cheap price) === |
||
| ⚫ | |||
| − | {| class="article-table" |
||
| − | ! |
+ | ! style="text-align: center;" colspan="2" | Offer |
| − | ! |
+ | ! style="text-align: center;" | Price |
| − | ! |
+ | ! style="text-align: center;" | Discount |
| + | ! style="text-align: center;" | Overprice |
||
|- |
|- |
||
| + | | rowspan="9" style="width: 200px; vertical-align: top;" | [[File:Handsome_Boy_Merchant.png|frameless|200px]] |
||
| ⚫ | |||
| − | | |
+ | | style="text-align: right;" | 1x |
| ⚫ | |||
| − | | align="center" | - |
||
| ⚫ | |||
| + | | - |
||
| + | | 16,66% |
||
|- |
|- |
||
| − | | |
+ | | style="text-align: right;" | 1000x |
| ⚫ | |||
| ⚫ | |||
| ⚫ | |||
| − | | align="center" | +10% |
||
| − | |- |
+ | | - |
| + | | - |
||
| − | | align="right" | 10x {{Icon|Heroic Summon Scroll|40px}} |
||
| ⚫ | |||
| − | | align="center" | +16,6% |
||
|- |
|- |
||
| − | | |
+ | | style="text-align: right;" | 500x |
| ⚫ | |||
| ⚫ | |||
| ⚫ | |||
| − | | align="center" | +16,6% |
||
| + | | - |
||
| + | | - |
||
|- |
|- |
||
| − | | |
+ | | style="text-align: right;" | 500K |
| − | | |
+ | | style="text-align: left;" | {{iconlink|Spirit}} |
| ⚫ | |||
| − | | align="center" | +25% |
||
| + | | 86,66% |
||
| + | | - |
||
|- |
|- |
||
| − | | |
+ | | style="text-align: right;" | 250K |
| − | | |
+ | | style="text-align: left;" | {{iconlink|Spirit}} |
| + | | {{NumericSpace}}400K {{Icon|Gold}} |
||
| − | | align="center" | +33,3% |
||
| + | | 86,66% |
||
| + | | - |
||
|- |
|- |
||
| − | | |
+ | | style="text-align: right;" | 5x |
| − | | |
+ | | style="text-align: left;" | {{iconlink|Chip}} |
| ⚫ | |||
| − | | align="center" | -20% |
||
| + | | - |
||
| + | | 16,66% |
||
| ⚫ | |||
| + | | style="text-align: right;" | 5x |
||
| + | | style="text-align: left;" | {{iconlink|Chip}} |
||
| + | | {{NumericSpace}}750K {{Icon|Gold}} |
||
| + | | - |
||
| + | | 50% |
||
| ⚫ | |||
| + | | style="text-align: right;" | 5x |
||
| + | | style="text-align: left;" | {{iconlink|Arena Ticket}} |
||
| + | | {{NumericSpace}}{{NumericSpace}}70x {{Icon|Gems}} |
||
| + | | 6,66% |
||
| + | | - |
||
| + | |- |
||
| + | | style="text-align: right;" | 5x |
||
| + | | style="text-align: left;" | {{iconlink|Arena Ticket}} |
||
| + | | {{NumericSpace}}300K {{Icon|Gold}} |
||
| + | | - |
||
| + | | 20% |
||
|} |
|} |
||
| − | === Lady Merchant |
+ | === Baroness Lady Merchant === |
| + | |||
| − | {| class="article-table" |
||
| − | + | {| class="article-table" style="width: 100%; text-align: center" |
|
| − | ! |
+ | ! style="text-align: center;" | Appearance |
| − | ! |
+ | ! style="text-align: center;" colspan="2" | Offer |
| + | ! style="text-align: center;" | Price |
||
| + | ! style="text-align: center;" | Discount |
||
| + | ! style="text-align: center;" | Overprice |
||
|- |
|- |
||
| + | | rowspan="8" style="width: 200px; vertical-align: top;" | [[File:Baroness_Lady_Merchant.png|frameless|200px]] |
||
| ⚫ | |||
| − | | |
+ | | style="text-align: right;" | 30x |
| ⚫ | |||
| − | | align="center" | 0% |
||
| ⚫ | |||
| ⚫ | |||
| + | | - |
||
| − | | align="right" | 1x {{Icon|Prophet Orb|40px}} |
||
| + | | - |
||
| ⚫ | |||
| − | | align="center" | 0% |
||
|- |
|- |
||
| + | | style="text-align: right;" | 30x |
||
| ⚫ | |||
| + | | style="text-align: left;" | {{iconlink|4 Star Hero Shard}} |
||
| ⚫ | |||
| + | | 1500K {{Icon|Gold}} |
||
| − | | align="center" | 0% |
||
| + | | - |
||
| + | | - |
||
|- |
|- |
||
| − | | |
+ | | style="text-align: right;" | 1x |
| − | | |
+ | | style="text-align: left;" | {{iconlink|Prophet Orb}} |
| ⚫ | |||
| − | | align="center" | -20% |
||
| + | | - |
||
| + | | - |
||
|- |
|- |
||
| − | | |
+ | | style="text-align: right;" | 5x |
| ⚫ | |||
| ⚫ | |||
| + | | {{NumericSpace}}750x {{Icon|Gems}} |
||
| − | | align="center" | 0% |
||
| + | | - |
||
| + | | - |
||
|- |
|- |
||
| − | | |
+ | | style="text-align: right;" | 10x |
| − | | |
+ | | style="text-align: left;" | {{iconlink|Arena Ticket}} |
| + | | {{NumericSpace}}120x {{Icon|Gems}} |
||
| − | | align="center" | -50% |
||
| + | | - |
||
| + | | - |
||
|- |
|- |
||
| − | | |
+ | | style="text-align: right;" | 10x |
| − | | |
+ | | style="text-align: left;" | {{iconlink|Arena Ticket}} |
| + | | {{NumericSpace}}600K {{Icon|Gold}} |
||
| − | | align="center" | 0% |
||
| + | | - |
||
| + | | 20% |
||
| + | |- |
||
| + | | style="text-align: right;" | 10x |
||
| + | | style="text-align: left;" | {{iconlink|Chip}} |
||
| + | | {{NumericSpace}}300x {{Icon|Gems}} |
||
| + | | - |
||
| + | | - |
||
| + | |- |
||
| + | | style="text-align: right;" | 10x |
||
| + | | style="text-align: left;" | {{iconlink|Chip}} |
||
| + | | 1500K {{Icon|Gold}} |
||
| + | | - |
||
| + | | 50% |
||
|} |
|} |
||
| − | === |
+ | === Old Lady Merchant === |
| − | {| class="article-table" |
+ | {| class="article-table" style="width: 100%; text-align: center" |
| − | ! |
+ | ! style="text-align: center;" | Appearance |
| − | ! |
+ | ! style="text-align: center;" colspan="2" | Offer |
| − | ! |
+ | ! style="text-align: center;" | Price |
| + | ! style="text-align: center;" | Discount |
||
| + | ! style="text-align: center;" | Overprice |
||
|- |
|- |
||
| + | | rowspan="7" style="width: 200px; vertical-align: top;" | [[File:Old_Lady_Merchant.png|frameless|200px]] |
||
| ⚫ | |||
| − | | |
+ | | style="text-align: right;" | 50x |
| ⚫ | |||
| − | | align="center" | -16,6% |
||
| + | | 3000x {{Icon|Gems}} |
||
| ⚫ | |||
| + | | d.n.a. |
||
| ⚫ | |||
| + | | d.n.a. |
||
| ⚫ | |||
| − | | align="center" | +/- 0% |
||
|- |
|- |
||
| + | | style="text-align: right;" | 5x |
||
| ⚫ | |||
| − | | |
+ | | style="text-align: left;" | {{iconlink|Prophet Orb}} |
| ⚫ | |||
| − | | align="center" | +/- 0% |
||
| + | | 10% |
||
| + | | - |
||
|- |
|- |
||
| − | | |
+ | | style="text-align: right;" | 10x |
| ⚫ | |||
| ⚫ | |||
| ⚫ | |||
| − | | align="center" | +86,66% |
||
| + | | 16,6% |
||
| + | | - |
||
|- |
|- |
||
| − | | |
+ | | style="text-align: right;" | 20x |
| − | | |
+ | | style="text-align: left;" | {{iconlink|Chip}} |
| + | | {{NumericSpace}}500x {{Icon|Gems}} |
||
| − | | align="center" | +86,66% |
||
| − | | |
+ | | 16,6% |
| + | | - |
||
| − | | align="right" | 5x {{Icon|Chip|40px}} |
||
| ⚫ | |||
| − | | align="center" | -50% |
||
|- |
|- |
||
| − | | |
+ | | style="text-align: right;" | 20x |
| − | | |
+ | | style="text-align: left;" | {{iconlink|Chip}} |
| + | | 1500K {{Icon|Gold}} |
||
| − | | align="center" | -2,77% |
||
| + | | 25% |
||
| + | | - |
||
|- |
|- |
||
| − | | |
+ | | style="text-align: right;" | 20x |
| − | | |
+ | | style="text-align: left;" | {{iconlink|Arena Ticket}} |
| + | | {{NumericSpace}}200x {{Icon|Gems}} |
||
| − | | align="center" | -20% |
||
| + | | 33,3% |
||
| + | | - |
||
|- |
|- |
||
| − | | |
+ | | style="text-align: right;" | 20x |
| − | | |
+ | | style="text-align: left;" | {{iconlink|Arena Ticket}} |
| + | | 1200K {{Icon|Gold}} |
||
| − | | align="center" | +6,66% |
||
| + | | - |
||
| + | | 20% |
||
|} |
|} |
||
==Potions== |
==Potions== |
||
| − | There are 2 types of potions that you can receive. |
+ | There are 2 types of potions that you can receive. The first type will heal your hero. There are 3 different healing potions. |
| + | {| class="article-table" style="width:100%; text-align: center;" |
||
| − | The first type will heal your hero. There are 3 different healing potions. |
||
| + | ! style="text-align: center; width: 15%" | Icon |
||
| − | |||
| + | ! style="text-align: center; width: 35%" | Name |
||
| − | {| class="article-table" |
||
| − | ! |
+ | ! style="text-align: center; width: 50%" | Effect |
| + | |- |
||
| ⚫ | |||
| ⚫ | |||
| − | |- align="center" |
||
| {{icon|Angel Potion|70px}} |
| {{icon|Angel Potion|70px}} |
||
| '''Angel Potion''' |
| '''Angel Potion''' |
||
| Recover Hero's (100%*HP) health |
| Recover Hero's (100%*HP) health |
||
| + | |- |
||
| − | |- align="center" |
||
| {{icon|Demon Potion|70px}} |
| {{icon|Demon Potion|70px}} |
||
| '''Demon Potion''' |
| '''Demon Potion''' |
||
| Recover Hero's (50%*HP) health and Energy +300 |
| Recover Hero's (50%*HP) health and Energy +300 |
||
| + | |- |
||
| − | |- align="center" |
||
| {{icon|Mysterious Milk|70px}} |
| {{icon|Mysterious Milk|70px}} |
||
| '''Mysterious Milk''' |
| '''Mysterious Milk''' |
||
| Line 154: | Line 210: | ||
|} |
|} |
||
| − | The second type will buff |
+ | The second type will buff all of your heroes in a passive way. You can acquire a total number of 20 of each potion. |
| − | {| class="article-table" |
+ | {| class="article-table" style="width:100%; text-align: center;" |
| − | ! |
+ | ! style="text-align: center; width: 15%" | Icon |
| − | ! |
+ | ! style="text-align: center; width: 35%" | Name |
| − | ! |
+ | ! style="text-align: center; width: 50%" | Effect |
|- |
|- |
||
| {{icon|Speed Potion|70px}} |
| {{icon|Speed Potion|70px}} |
||
| − | + | | '''Speed Potion''' |
|
| − | + | | Speed +10 |
|
|- |
|- |
||
| {{icon|Power Potion|70px}} |
| {{icon|Power Potion|70px}} |
||
| − | + | | '''Power Potion''' |
|
| − | + | | Attack +1.5% |
|
|- |
|- |
||
| {{icon|Crit Potion|70px}} |
| {{icon|Crit Potion|70px}} |
||
| − | + | | '''Crit Potion''' |
|
| − | + | | Crit +2.0% |
|
|} |
|} |
||
| + | ==Guides and Tips== |
||
| + | The following are links to wiki blog posts with more information regarding heroes and tips. |
||
| + | *[[User_blog:ShiLyn/Aspen_Heroes| Aspen Heroes]] |
||
| + | [[Category:Battles]] |
||
Latest revision as of 08:13, 17 July 2019
The Aspen Dungeon is on a cycle, where it is 48 hrs open and then on cooldown for 48 hrs. The Aspen Dungeon unlocks at Level 72. You can send 5 heroes to the Aspen Dungeon. Once you have chosen your 5 heroes, it looks like any gear changes will not be applied.
There will be waves of enemies and for each wave you have to select a hero to battle it. Health is not regenerated between waves so this dungeon is in iron man mode. Once your hero dies, they cannot take part in the dungeon until the next one opens. You can choose "Skip the Battle" in order to skip the fight itself. The layout was changed in the 1.17.37 update.
After defeating each wave, you will be presented with a reward. There are 3 different rewards possible - a Chest, a Vagrant Merchant or a Potion. Chests can provide Gold, Spirit, Gems or Monster Materials. Vagrant Merchants will sell various things to you (the prices are dependent on which Vagrant Merchant you get). Potions will either heal or buff your hero.
There are currently 6 stages (Easy, Normal, Difficult, Nightmare, Hell, Death) with 100 levels in each stage and once you pass 50 levels the next time you enter the dungeon it will automatically smash up to your current check point. Check Points are at levels 50 and level 100 of each stage. So if you pass to Easy 98 the next time aspens opens you will smash the first 50 levels and start from Easy 51 until you are able to pass Easy 100.
Vagrant Merchant Items
The discount/overprice is calculated based on the maximum Marketplace prices. The higher the discount is, the more you get for your money. The higher the overprice is, the less you get for your money.
Handsome Boy Merchant
| Appearance | Offer | Price | Discount | Overprice | |
|---|---|---|---|---|---|

|
1x | 175x |
- | 16,66% | |
| 1000x | 2400K |
- | - | ||
| 500x | 1200K |
- | - | ||
| 500K | 800K |
86,66% | - | ||
| 250K | 400K |
86,66% | - | ||
| 5x | 175x |
- | 16,66% | ||
| 5x | 750K |
- | 50% | ||
| 5x | 70x |
6,66% | - | ||
| 5x | 300K |
- | 20% | ||
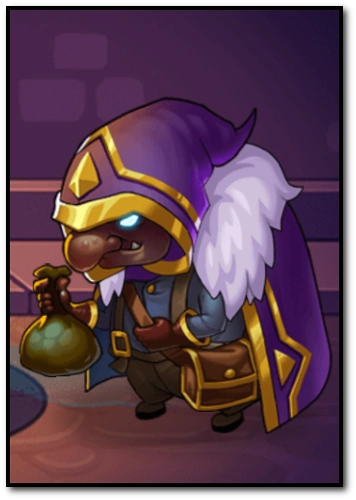
Baroness Lady Merchant
| Appearance | Offer | Price | Discount | Overprice | |
|---|---|---|---|---|---|

|
30x | 500x |
- | - | |
| 30x | 1500K |
- | - | ||
| 1x | 500x |
- | - | ||
| 5x | 750x |
- | - | ||
| 10x | 120x |
- | - | ||
| 10x | 600K |
- | 20% | ||
| 10x | 300x |
- | - | ||
| 10x | 1500K |
- | 50% | ||
Old Lady Merchant
| Appearance | Offer | Price | Discount | Overprice | |
|---|---|---|---|---|---|
|
50x | 3000x |
d.n.a. | d.n.a. | |
| 5x | 2250x |
10% | - | ||
| 10x | 1250x |
16,6% | - | ||
| 20x | 500x |
16,6% | - | ||
| 20x | 1500K |
25% | - | ||
| 20x | 200x |
33,3% | - | ||
| 20x | 1200K |
- | 20% | ||
Potions
There are 2 types of potions that you can receive. The first type will heal your hero. There are 3 different healing potions.
| Icon | Name | Effect |
|---|---|---|
| Angel Potion | Recover Hero's (100%*HP) health | |
| Demon Potion | Recover Hero's (50%*HP) health and Energy +300 | |
| Mysterious Milk | Recover Hero's (20%*HP) health |
The second type will buff all of your heroes in a passive way. You can acquire a total number of 20 of each potion.
| Icon | Name | Effect |
|---|---|---|
| Speed Potion | Speed +10 | |
| Power Potion | Attack +1.5% | |
| Crit Potion | Crit +2.0% |
Guides and Tips
The following are links to wiki blog posts with more information regarding heroes and tips.